Mute Findings (Allowlisting)
You can mute findings from your Prowler SaaS account by creating an Allowlist.
- Muted findings no longer appear in your dashboards and reports unless you select "Show Muted Findings" in the filters menu.
- Muted Findings will take effect on the next scan.
- You may modify your Muted Findings configuration at anytime on the Findings page.
- Lean more about configuring your Muted Findings here: Prowler Allowlist Documentation
Creating an Allowlist
From your Findings page, you can create an Allowlist by clicking the ellipsis at the top right of the Findings table, and then selecting the "Mute Findings for Selected Filters" or "Configure Muted Findings" option:
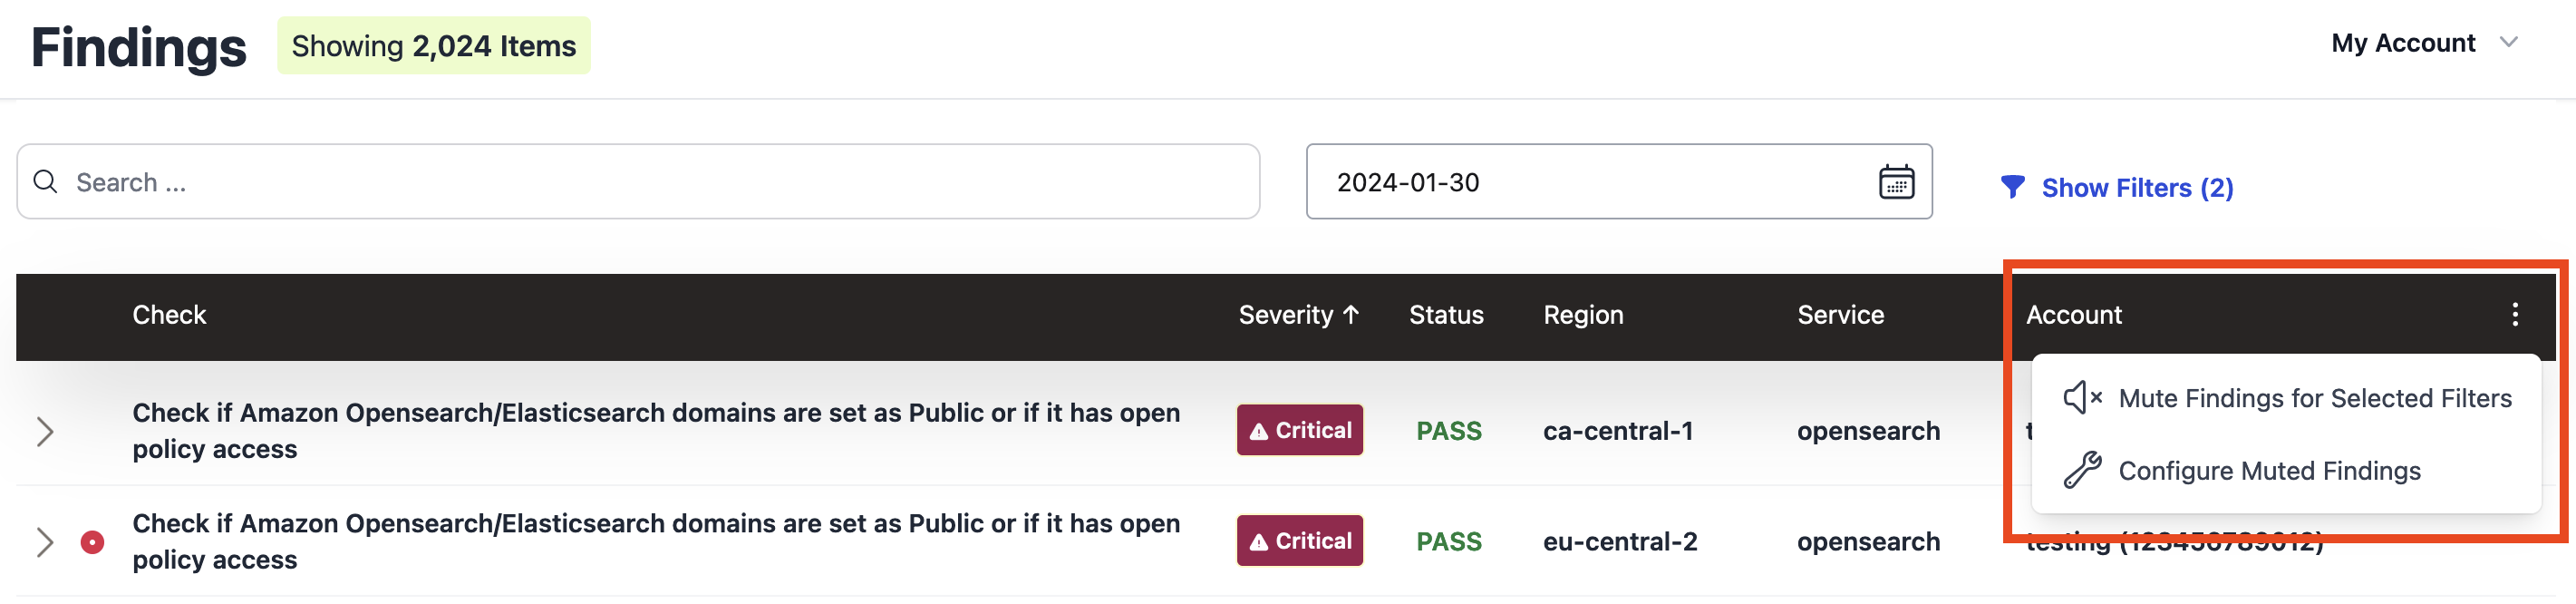
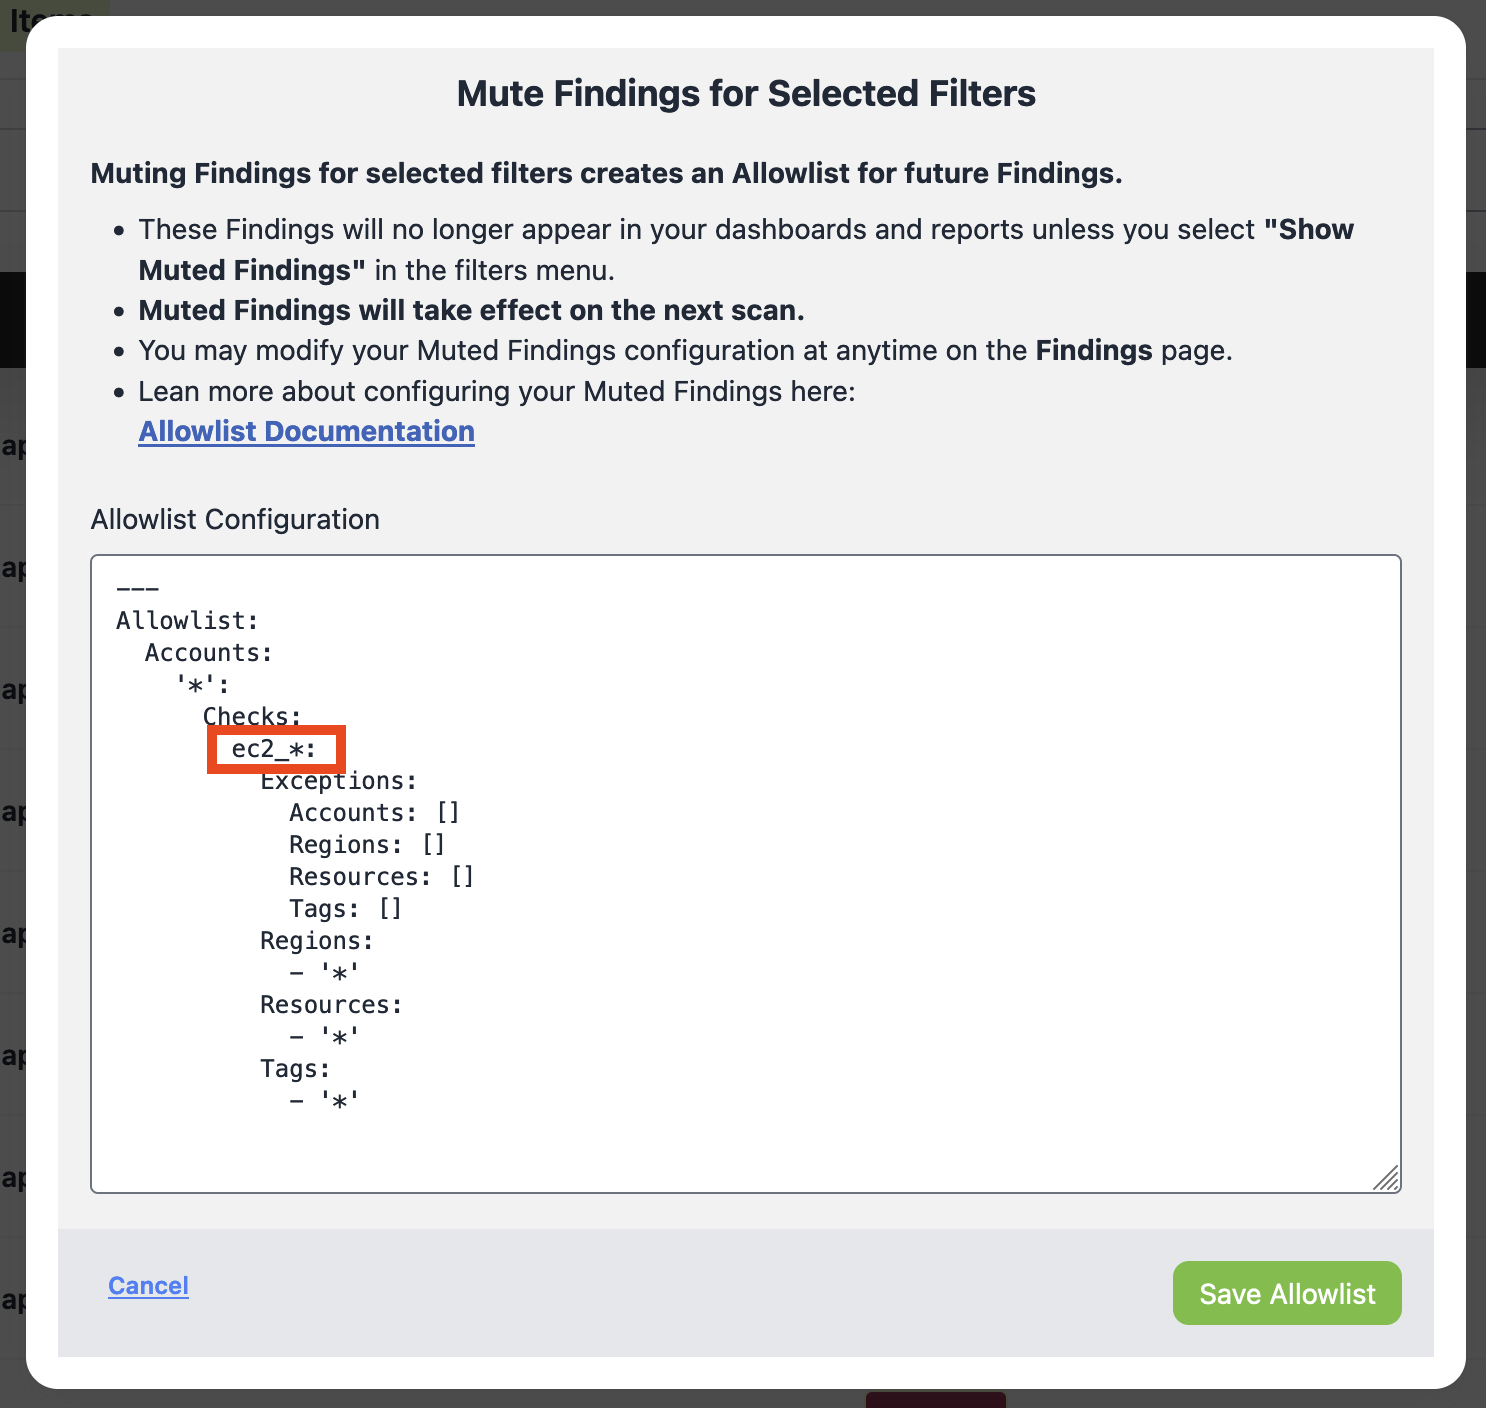
For example, if you wanted to mute all findings from Prowler checks for the EC2 service, you can select ec2 from the Service filter dropdown, and then click the "Mute Findings for Selected Filters" option from the ellipsis menu. Doing so will open a modal with an Allowlist configuration that matches the applicable filters selected:
Customizing an Allowlist
The YAML contents of the Allowlist configuration can be edited to suit your needs. For syntax examples and more information on this functionality, please refer to the Prowler Allowlist Documentation.
Note
Changes to Allowlists will take effect on the next scan of your AWS accounts, and will not retroactively change existing Findings.
Deleting an Allowlist
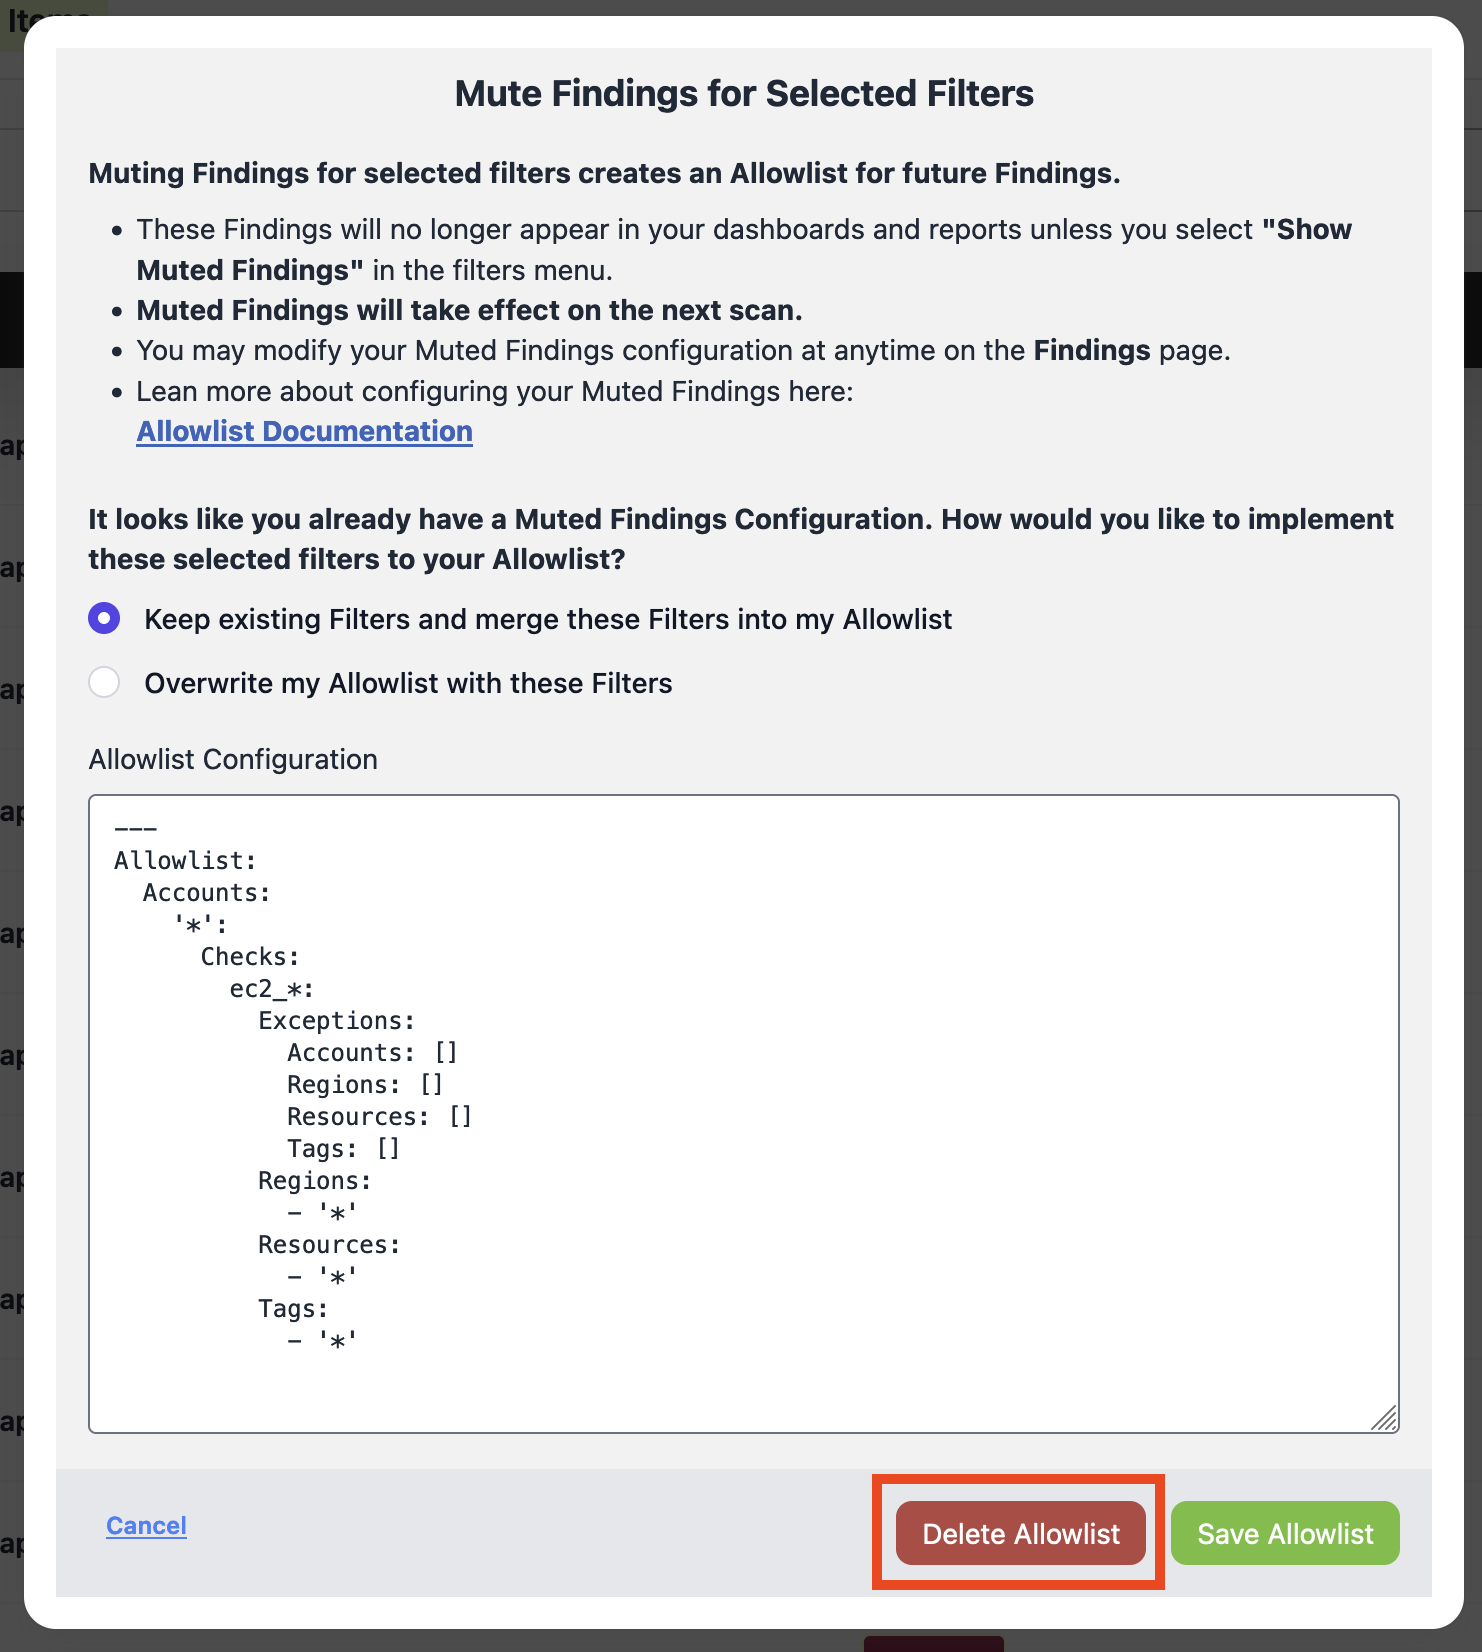
Once an Allowlist has been saved, it can be edited or removed at any time. To remove an Allowlist, click the "Configure Muted Findings" button or the "Mute Findings for Selected Filters" button on the Findings page. Once the modal appears, you can click the "Delete Allowlist" button at the bottom:
Viewing Muted Findings
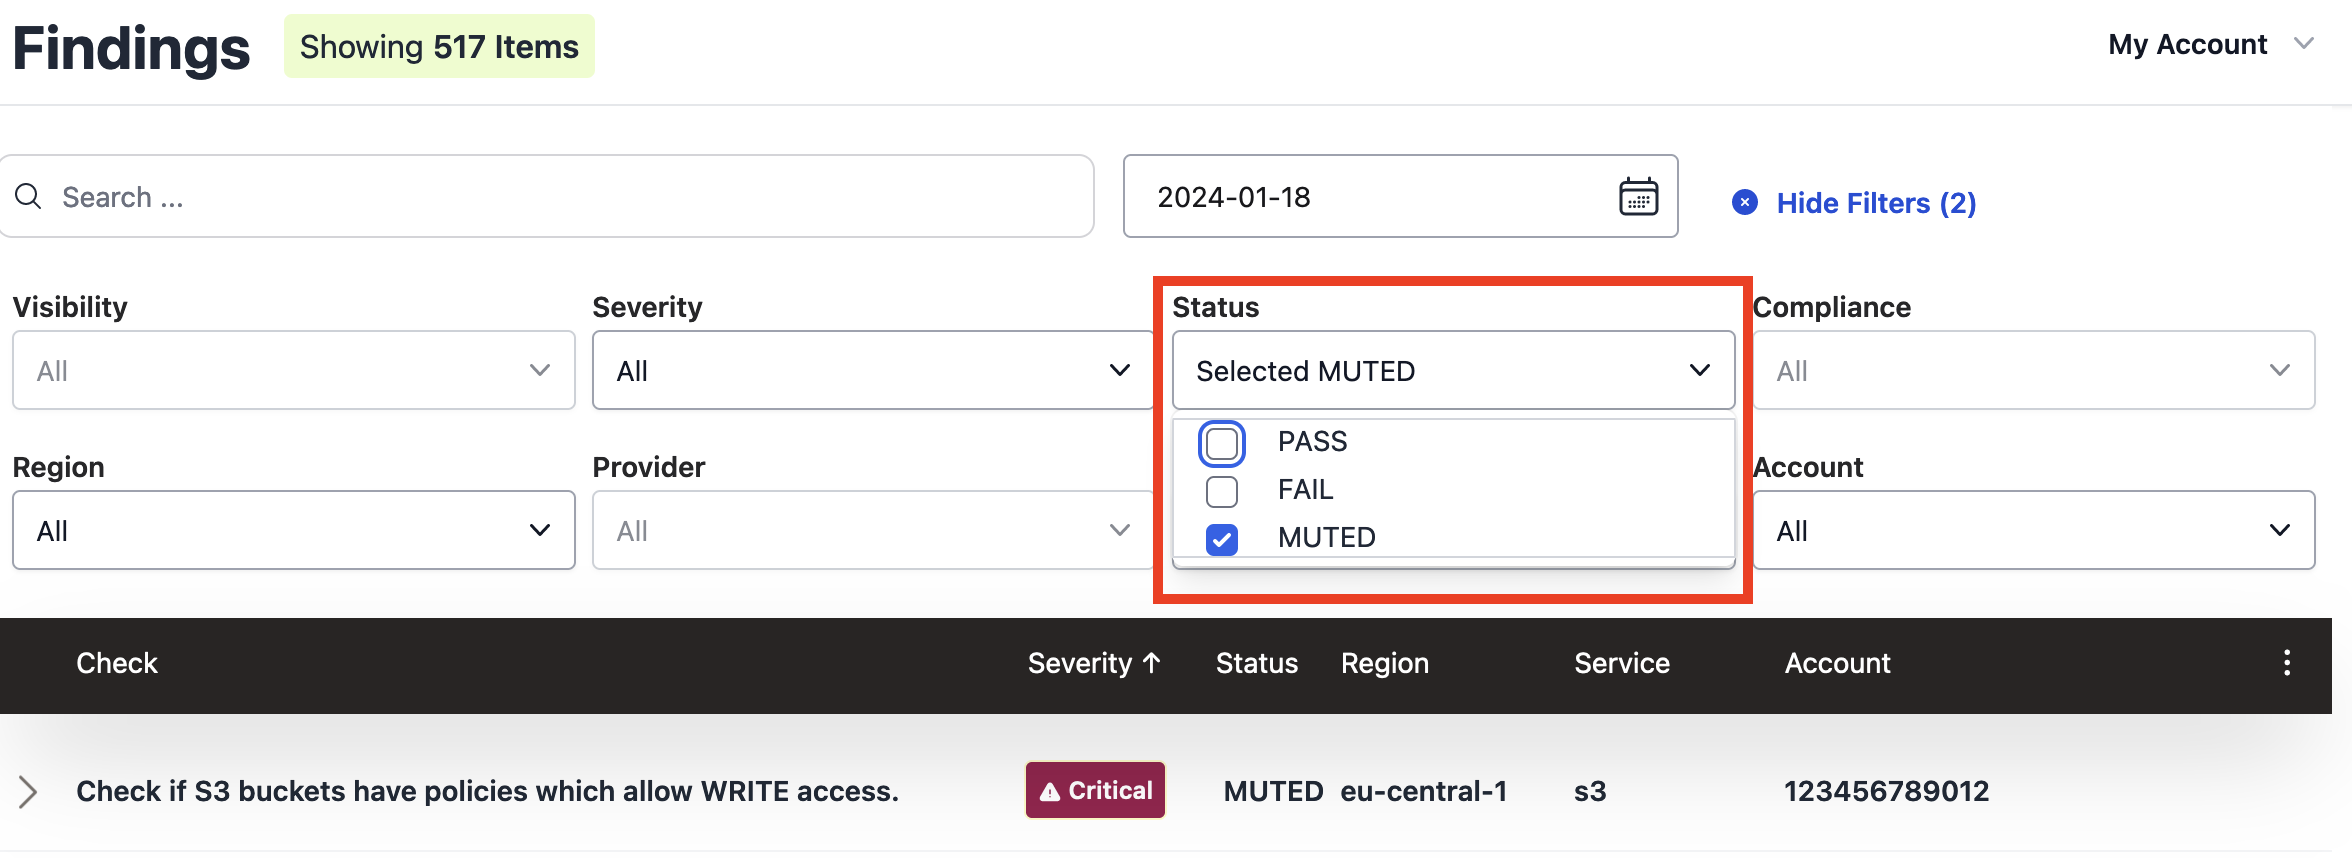
You can view Muted Findings by selecting the MUTED status on the Findings page: