Introduction
This document provides instructions on how to use the Jira integration feature within Prowler SaaS. The Jira integration allows for the creation and management of security issue tickets directly within your Jira environment.
Prerequisites
Before you begin, ensure that you have the following:
- An active Prowler SaaS account.
- Administrative access to your Jira Organization.
- The appropriate permissions to create and manage projects and issues in Jira.
Step-by-Step Guide
Step 1: Accessing the Integration Page
- Log in to your Prowler SaaS account.
- Go to Integrations
Step 2: Setting Up Jira Integration
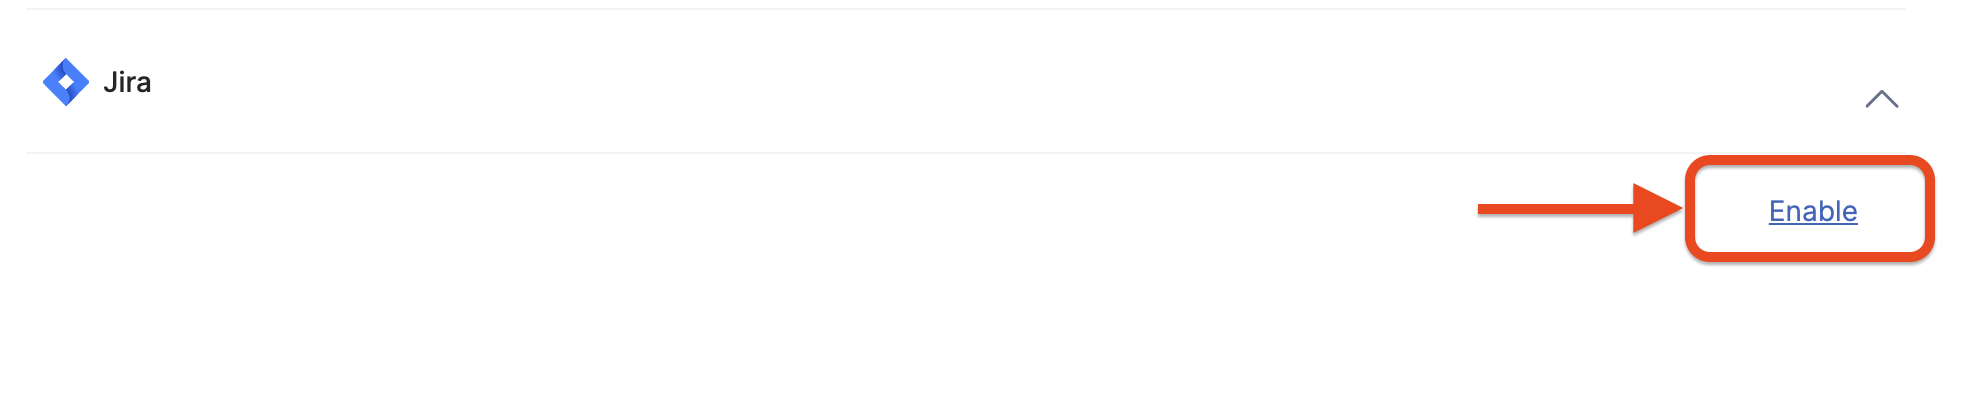
- Locate the Jira section within the integrations page.
- Click on the 'Enable' button to configure authorize Prowler SaaS to access your Jira Organization.
- You'll be asked to review the permissions that Prowler Saas requires.
- Click Accept to authorize Prowler Saas to:
read:jira-work: Read Jira Project & Issue Datawrite:jira-work: Create and Edit issues in Jiraread:me: Issues created by Prowler will use your user name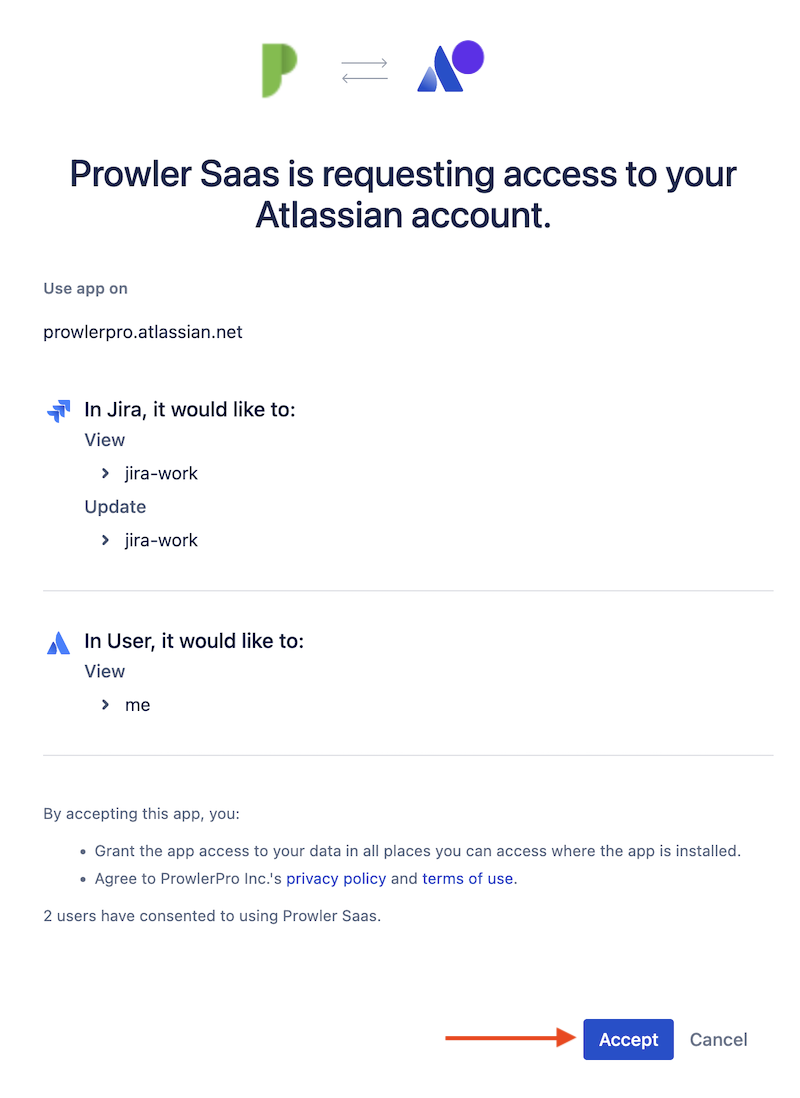
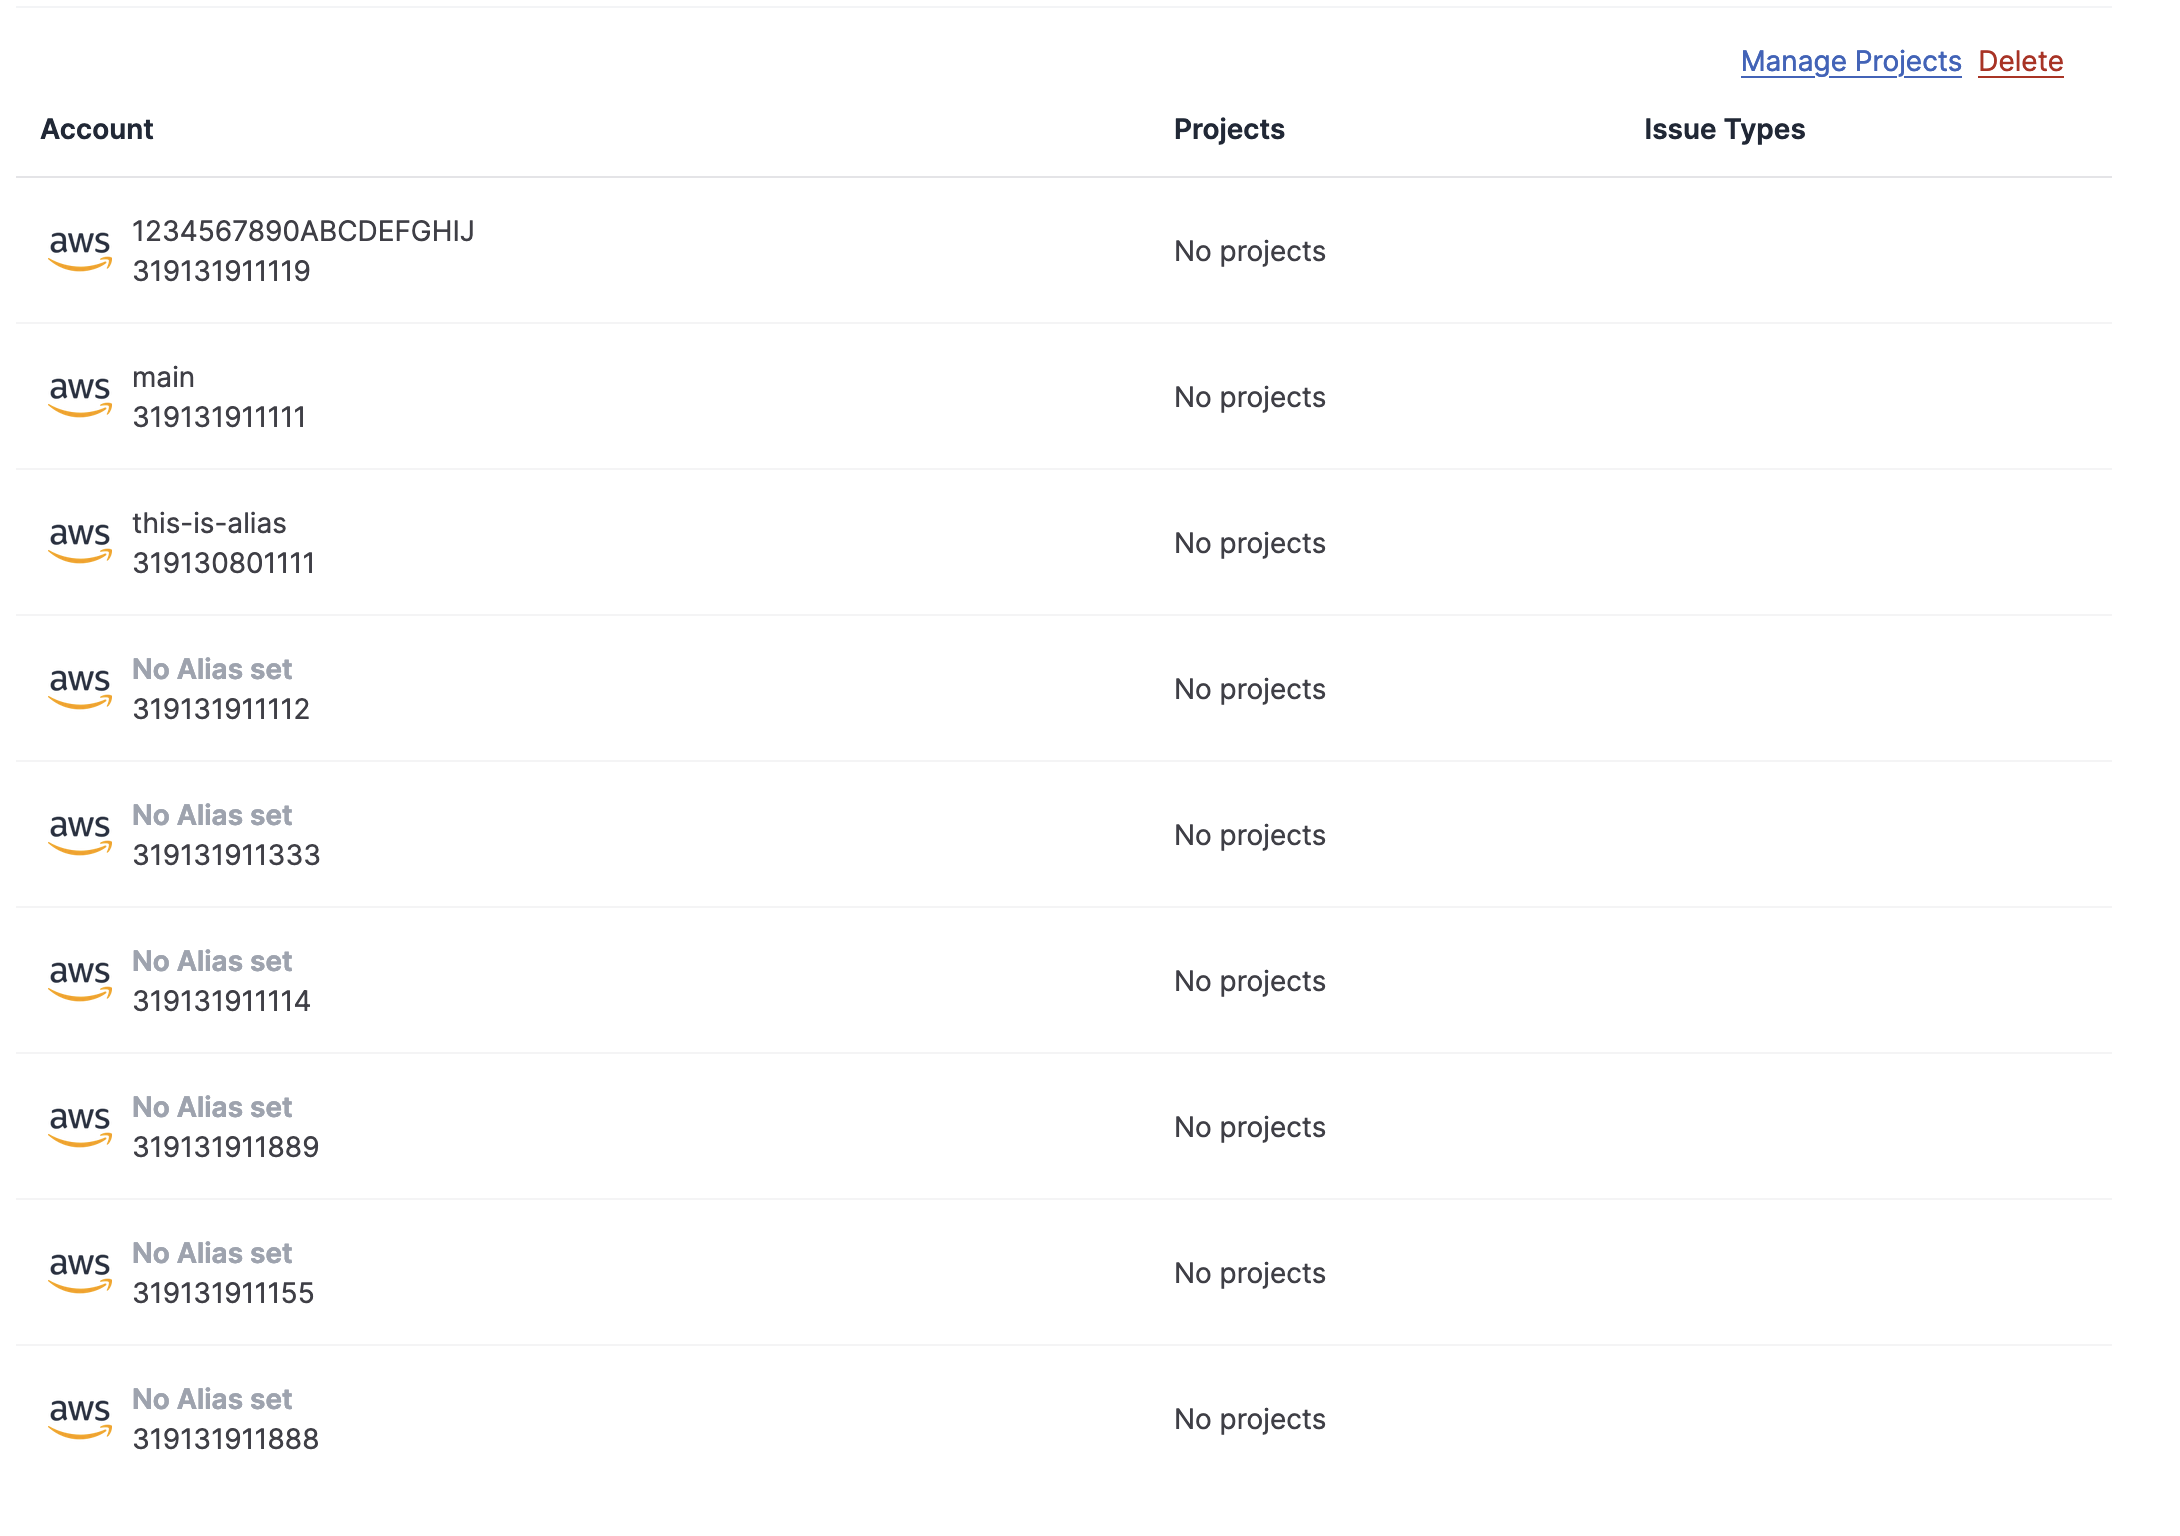
- If successful, you'll see this page:
For more information on permissions used by Prowler SaaS, see Jira scopes for OAuth 2.0 (3LO) and Forge apps
Step 3: Configuring Jira Projects
By default no projects are added to the accounts that are monitored by Prowler SaaS. You must configure Prowler SaaS for the Jira projects you want to use.
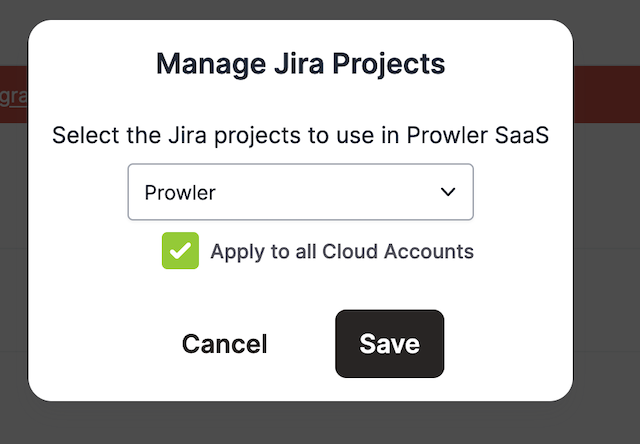
- Click the Manage Projects link under the Jira integration tab
- Here you will be able to select which Jira projects you want Prowler SaaS to use
- Clicking the Apply to all Cloud Accounts checkbox will automatically enable the selected projects for all of your Cloud Accounts
- Click Save to save your Jira configuration
Step 4: Configuring Jira Projects & Issues for each Cloud Account
You can limit the Projects & Issues available to your users
- In the 'Projects' column, select the Jira project where you want the issues to be created.
- In the 'Issue Types' column, select the type of issue that will be created in Jira (e.g., Bug, Task, Story).
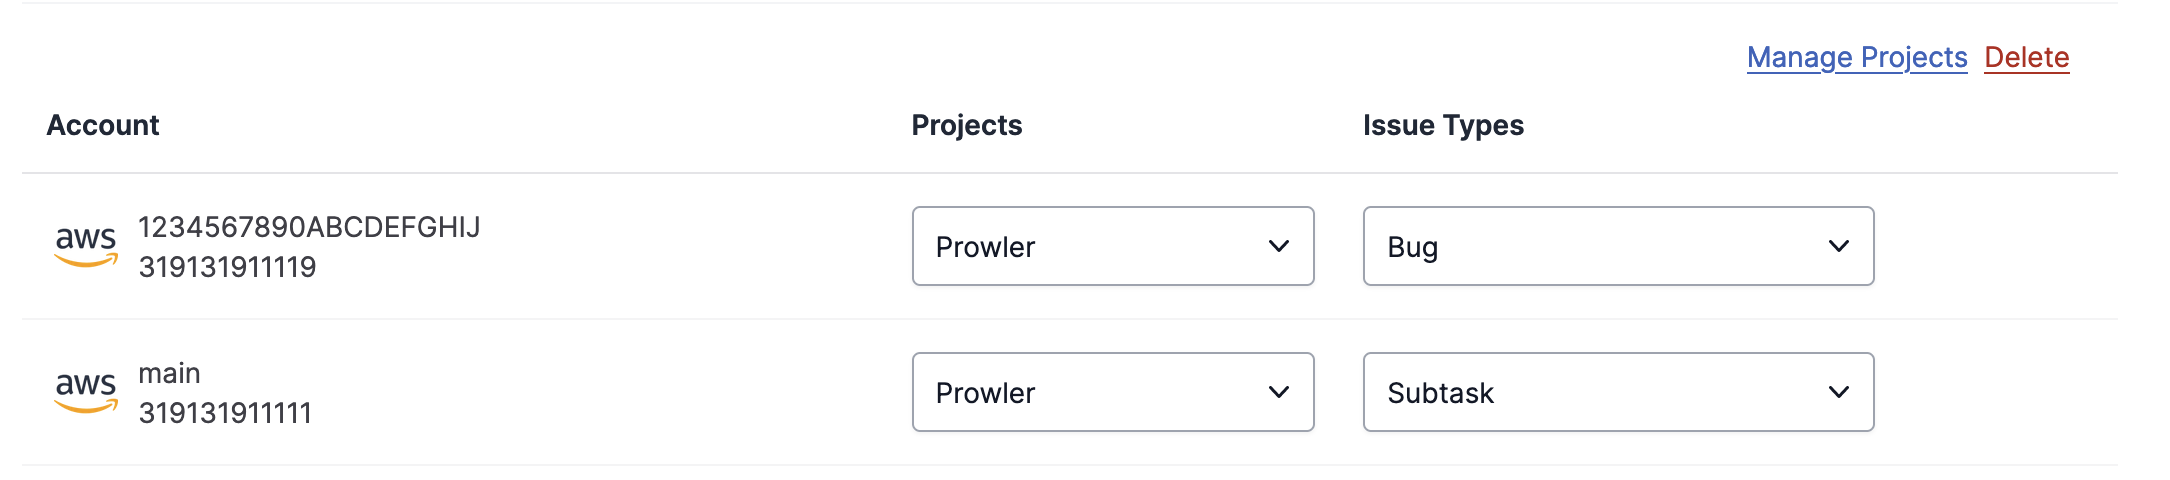
If no Projects or Issue Types are selected, all Projects and Issues Types will be available when Sending Findings to Jira.
Sending Findings to Jira
Once the Jira Integration has been configured, you can send findings directly to your Jira project from the Findings page
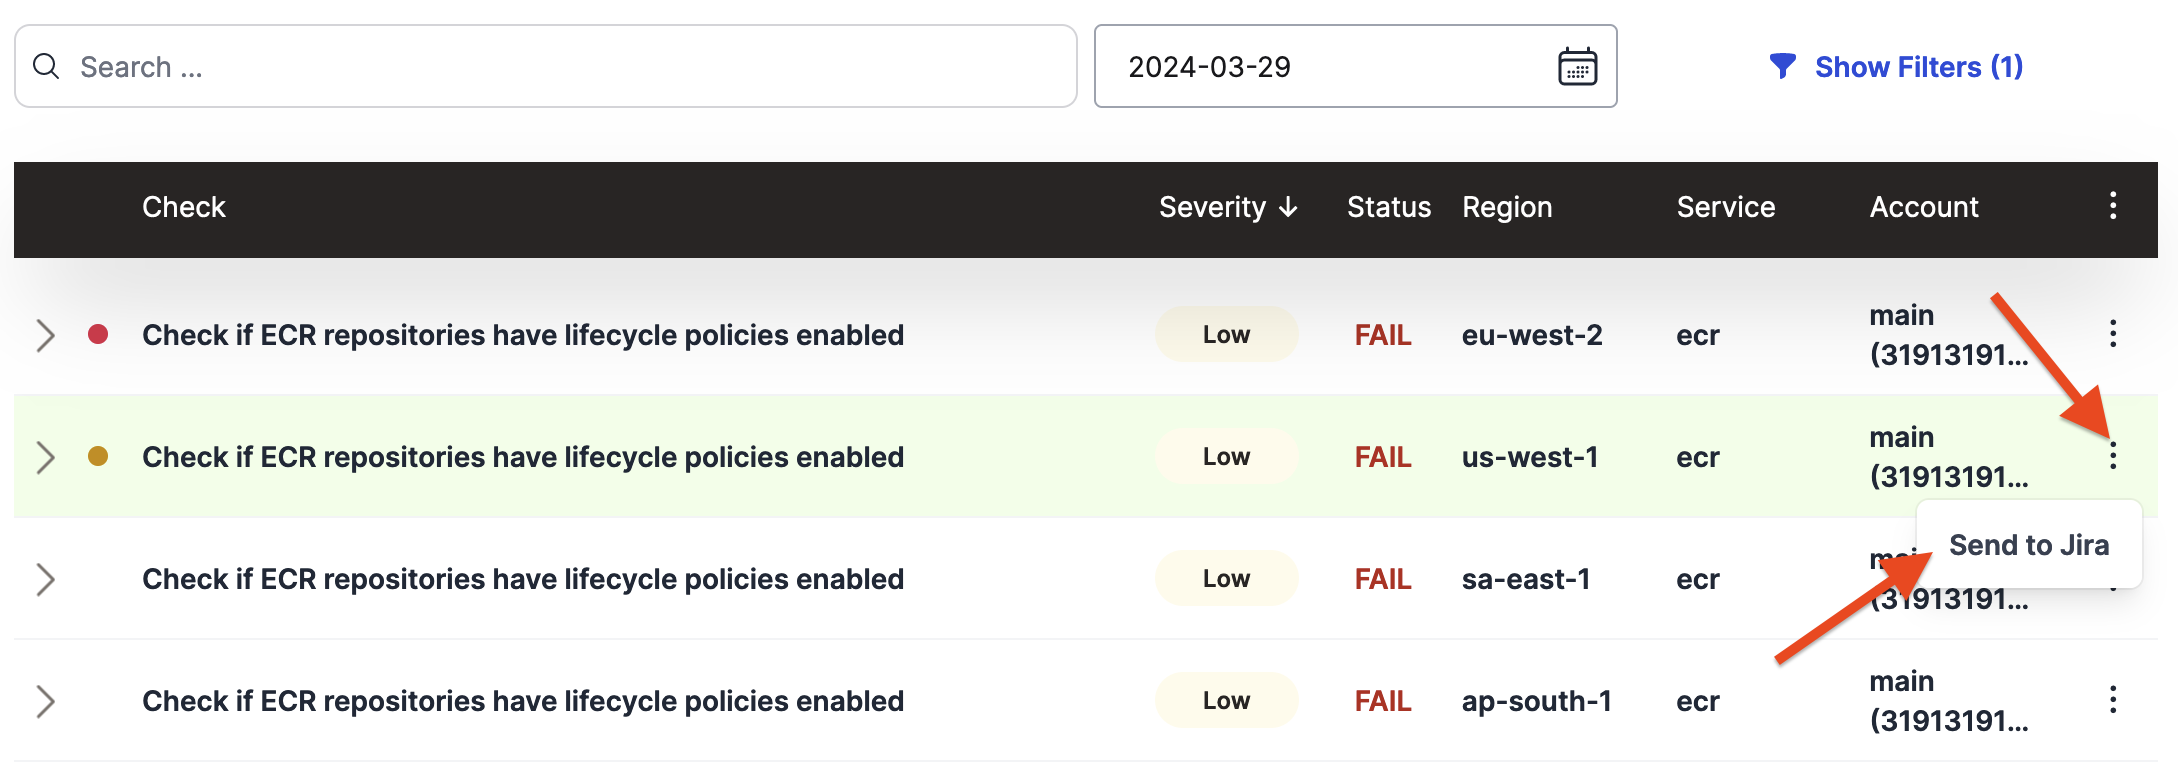
Step 1: Access the Findings Page
- Log in to your Prowler SaaS account.
- Go to Findings
Step 2: Send to Jira
- Click the three vertical dots for a finding.
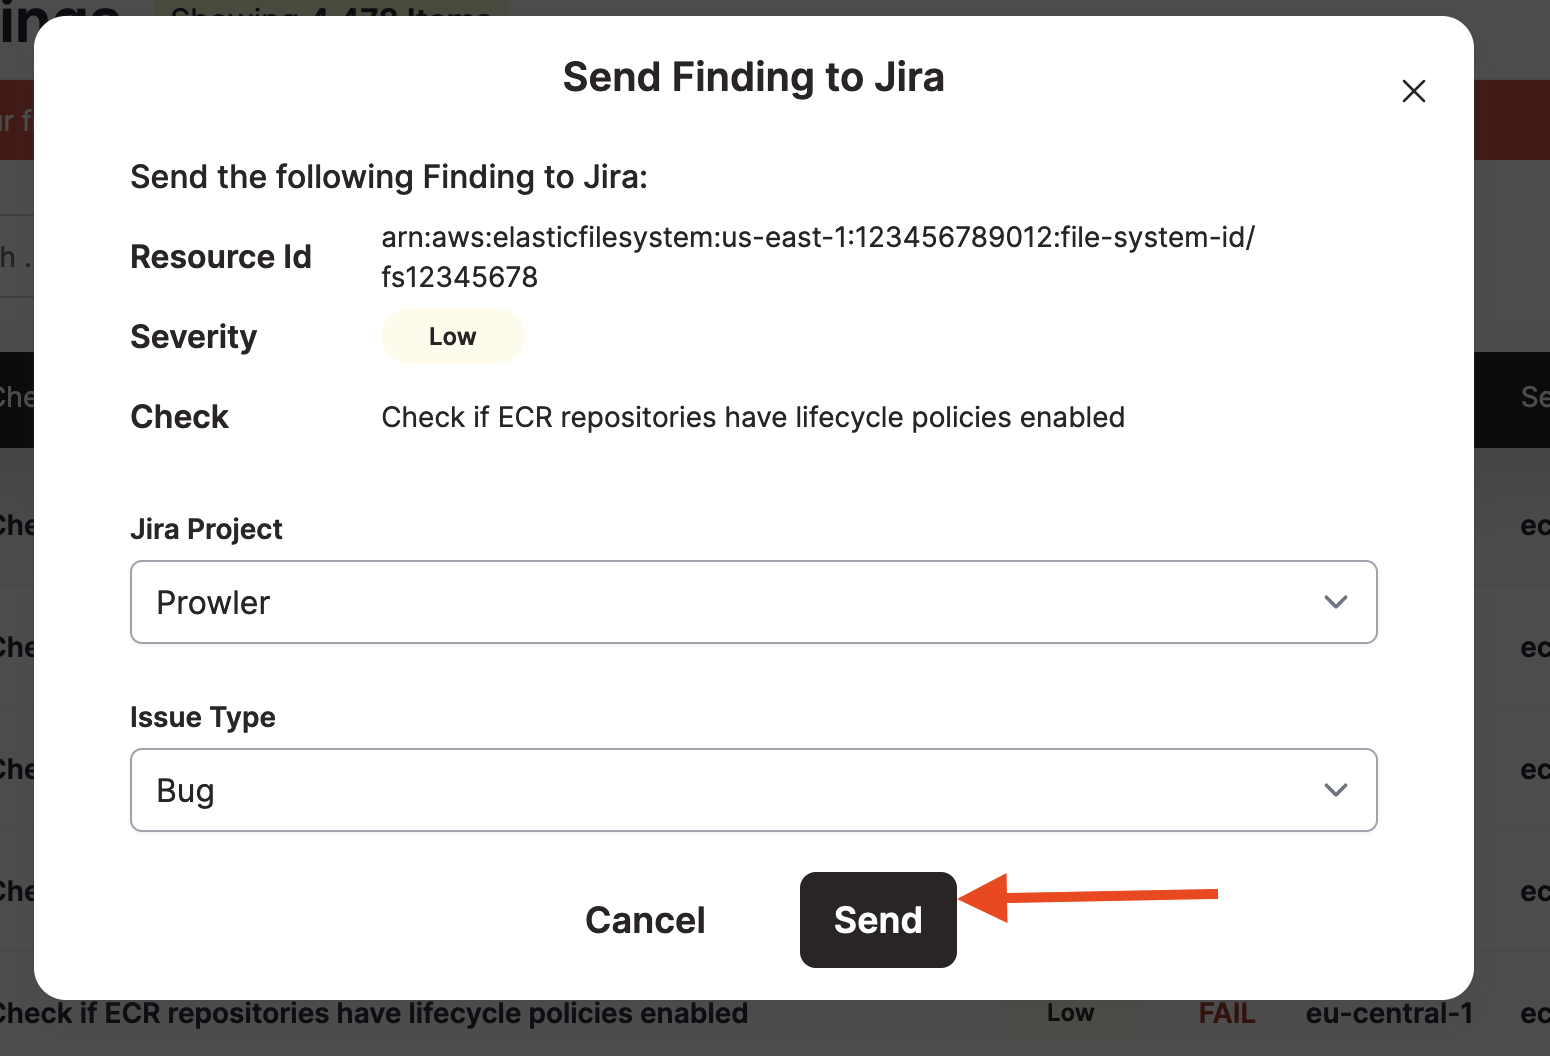
- On the dropdown menu that opens, select Send to Jira, a window will open.
- Review the finding information
- (optional) Change the Jira Project.
- (optional) Change the Jira Issue Type.
- Click Send
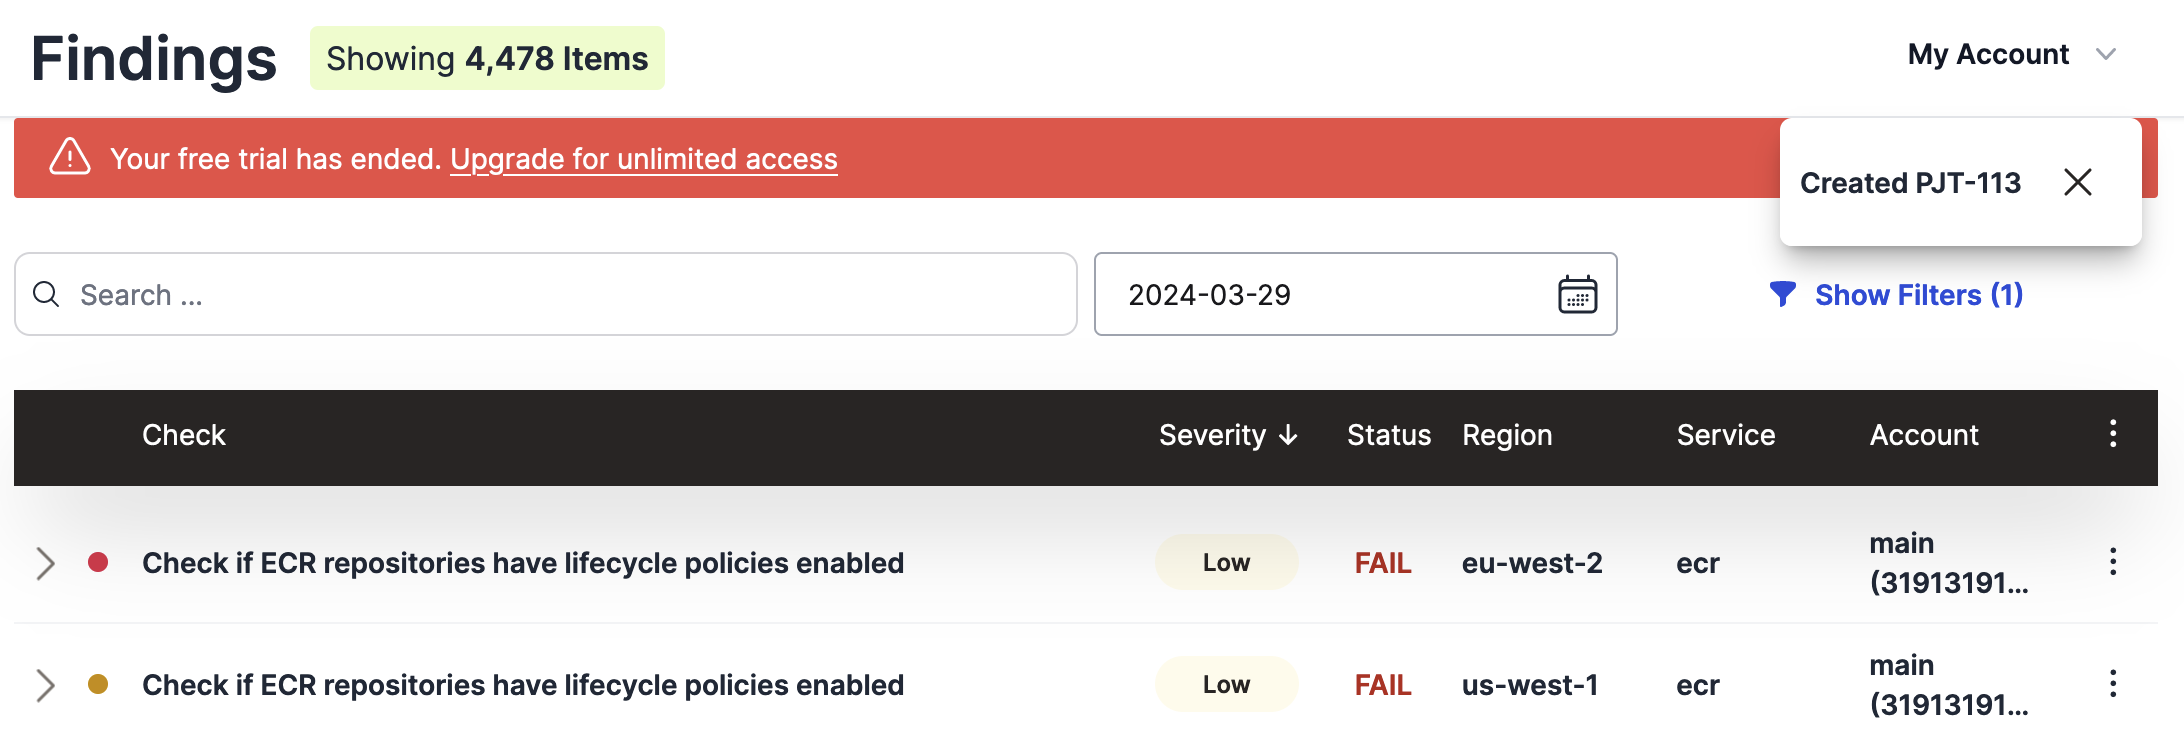
- If successful, you'll see a flash message that indicates the issue key.
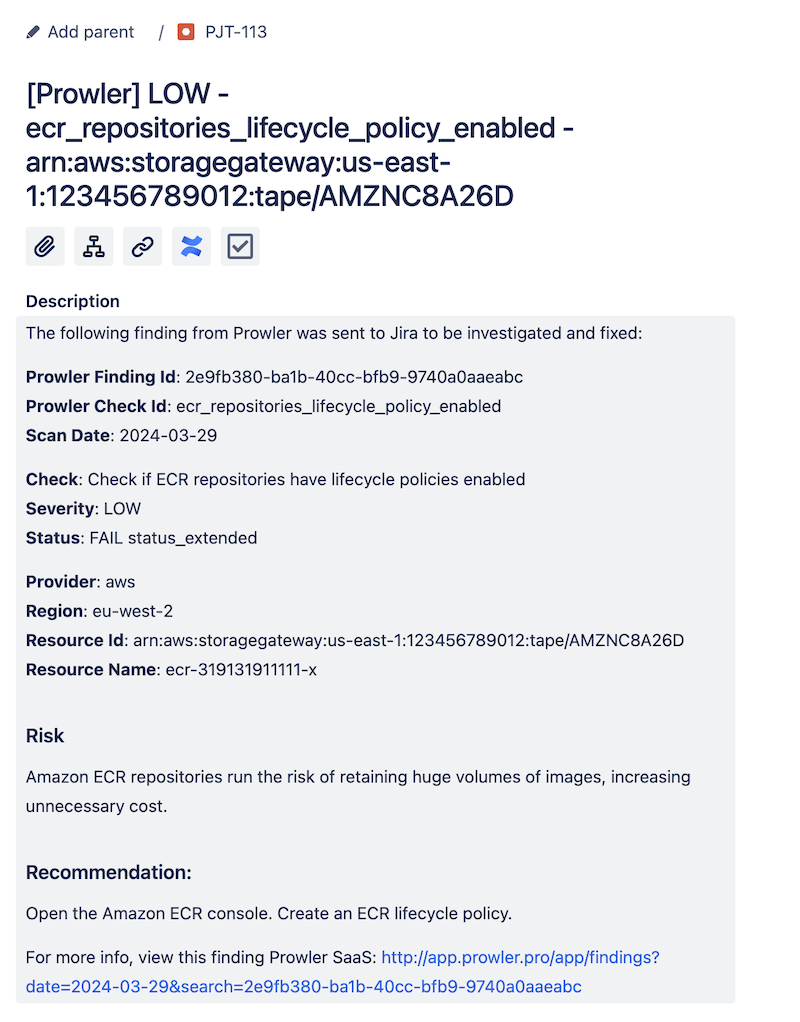
Step 3: Review finding in Jira
In Jira a new issue has been created with this format:
Removing Jira Integration
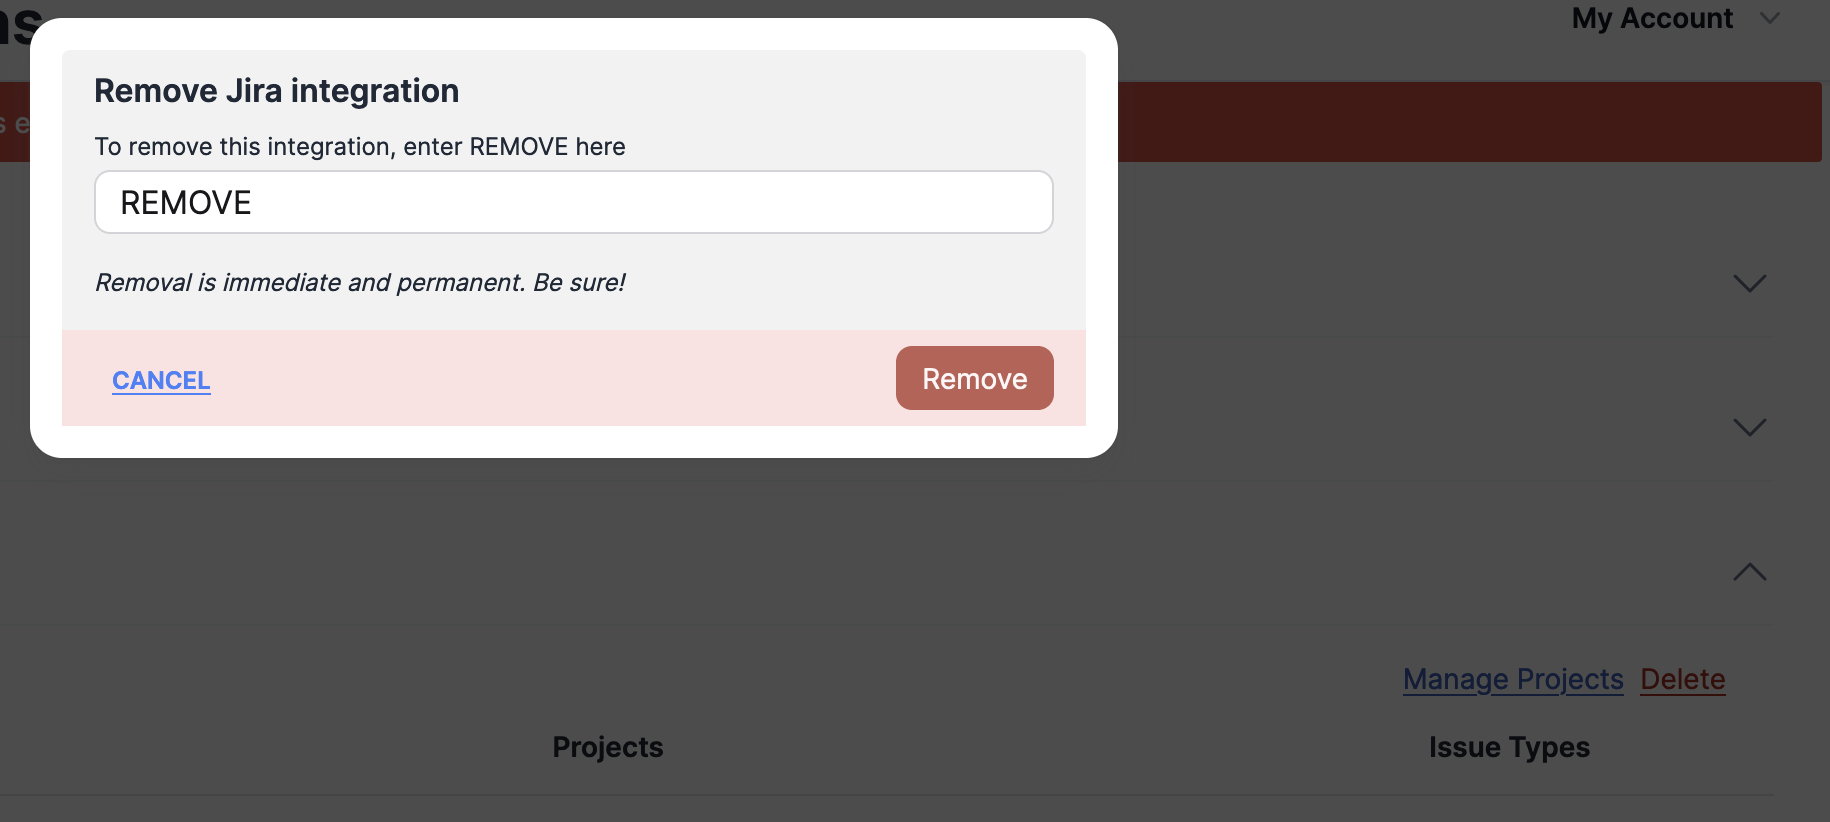
If you no longer want to use the Jira integration, you can remove it and all your Jira configuration data from Prowler SaaS.
- Log in to your Prowler SaaS account.
- Go to the Jira Integration
- Click Delete
- In the modal that opens you must enter REMOVE
- Click Remove to completely remove your Jira Configuration
Troubleshooting
If you encounter any issues with the Jira integration:
- Check that the issue types selected are available and properly configured in your Jira project.
- Ensure that the Prowler SaaS account has the necessary permissions to create issues in the selected Jira project.
Re-authorize Prowler SaaS to access Jira
If you are not able to send findings to Jira, the integration may be disabled. You can review this and re-authorize Prowler SaaS to access your Jira Organization.
- Log in to your Prowler SaaS account.
- Go to the Jira Integration
- Click the Click to Re-authorize Link.
- You'll be taken to Jira to confirm your settings
- Click Accept to enable Prowler SaaS again